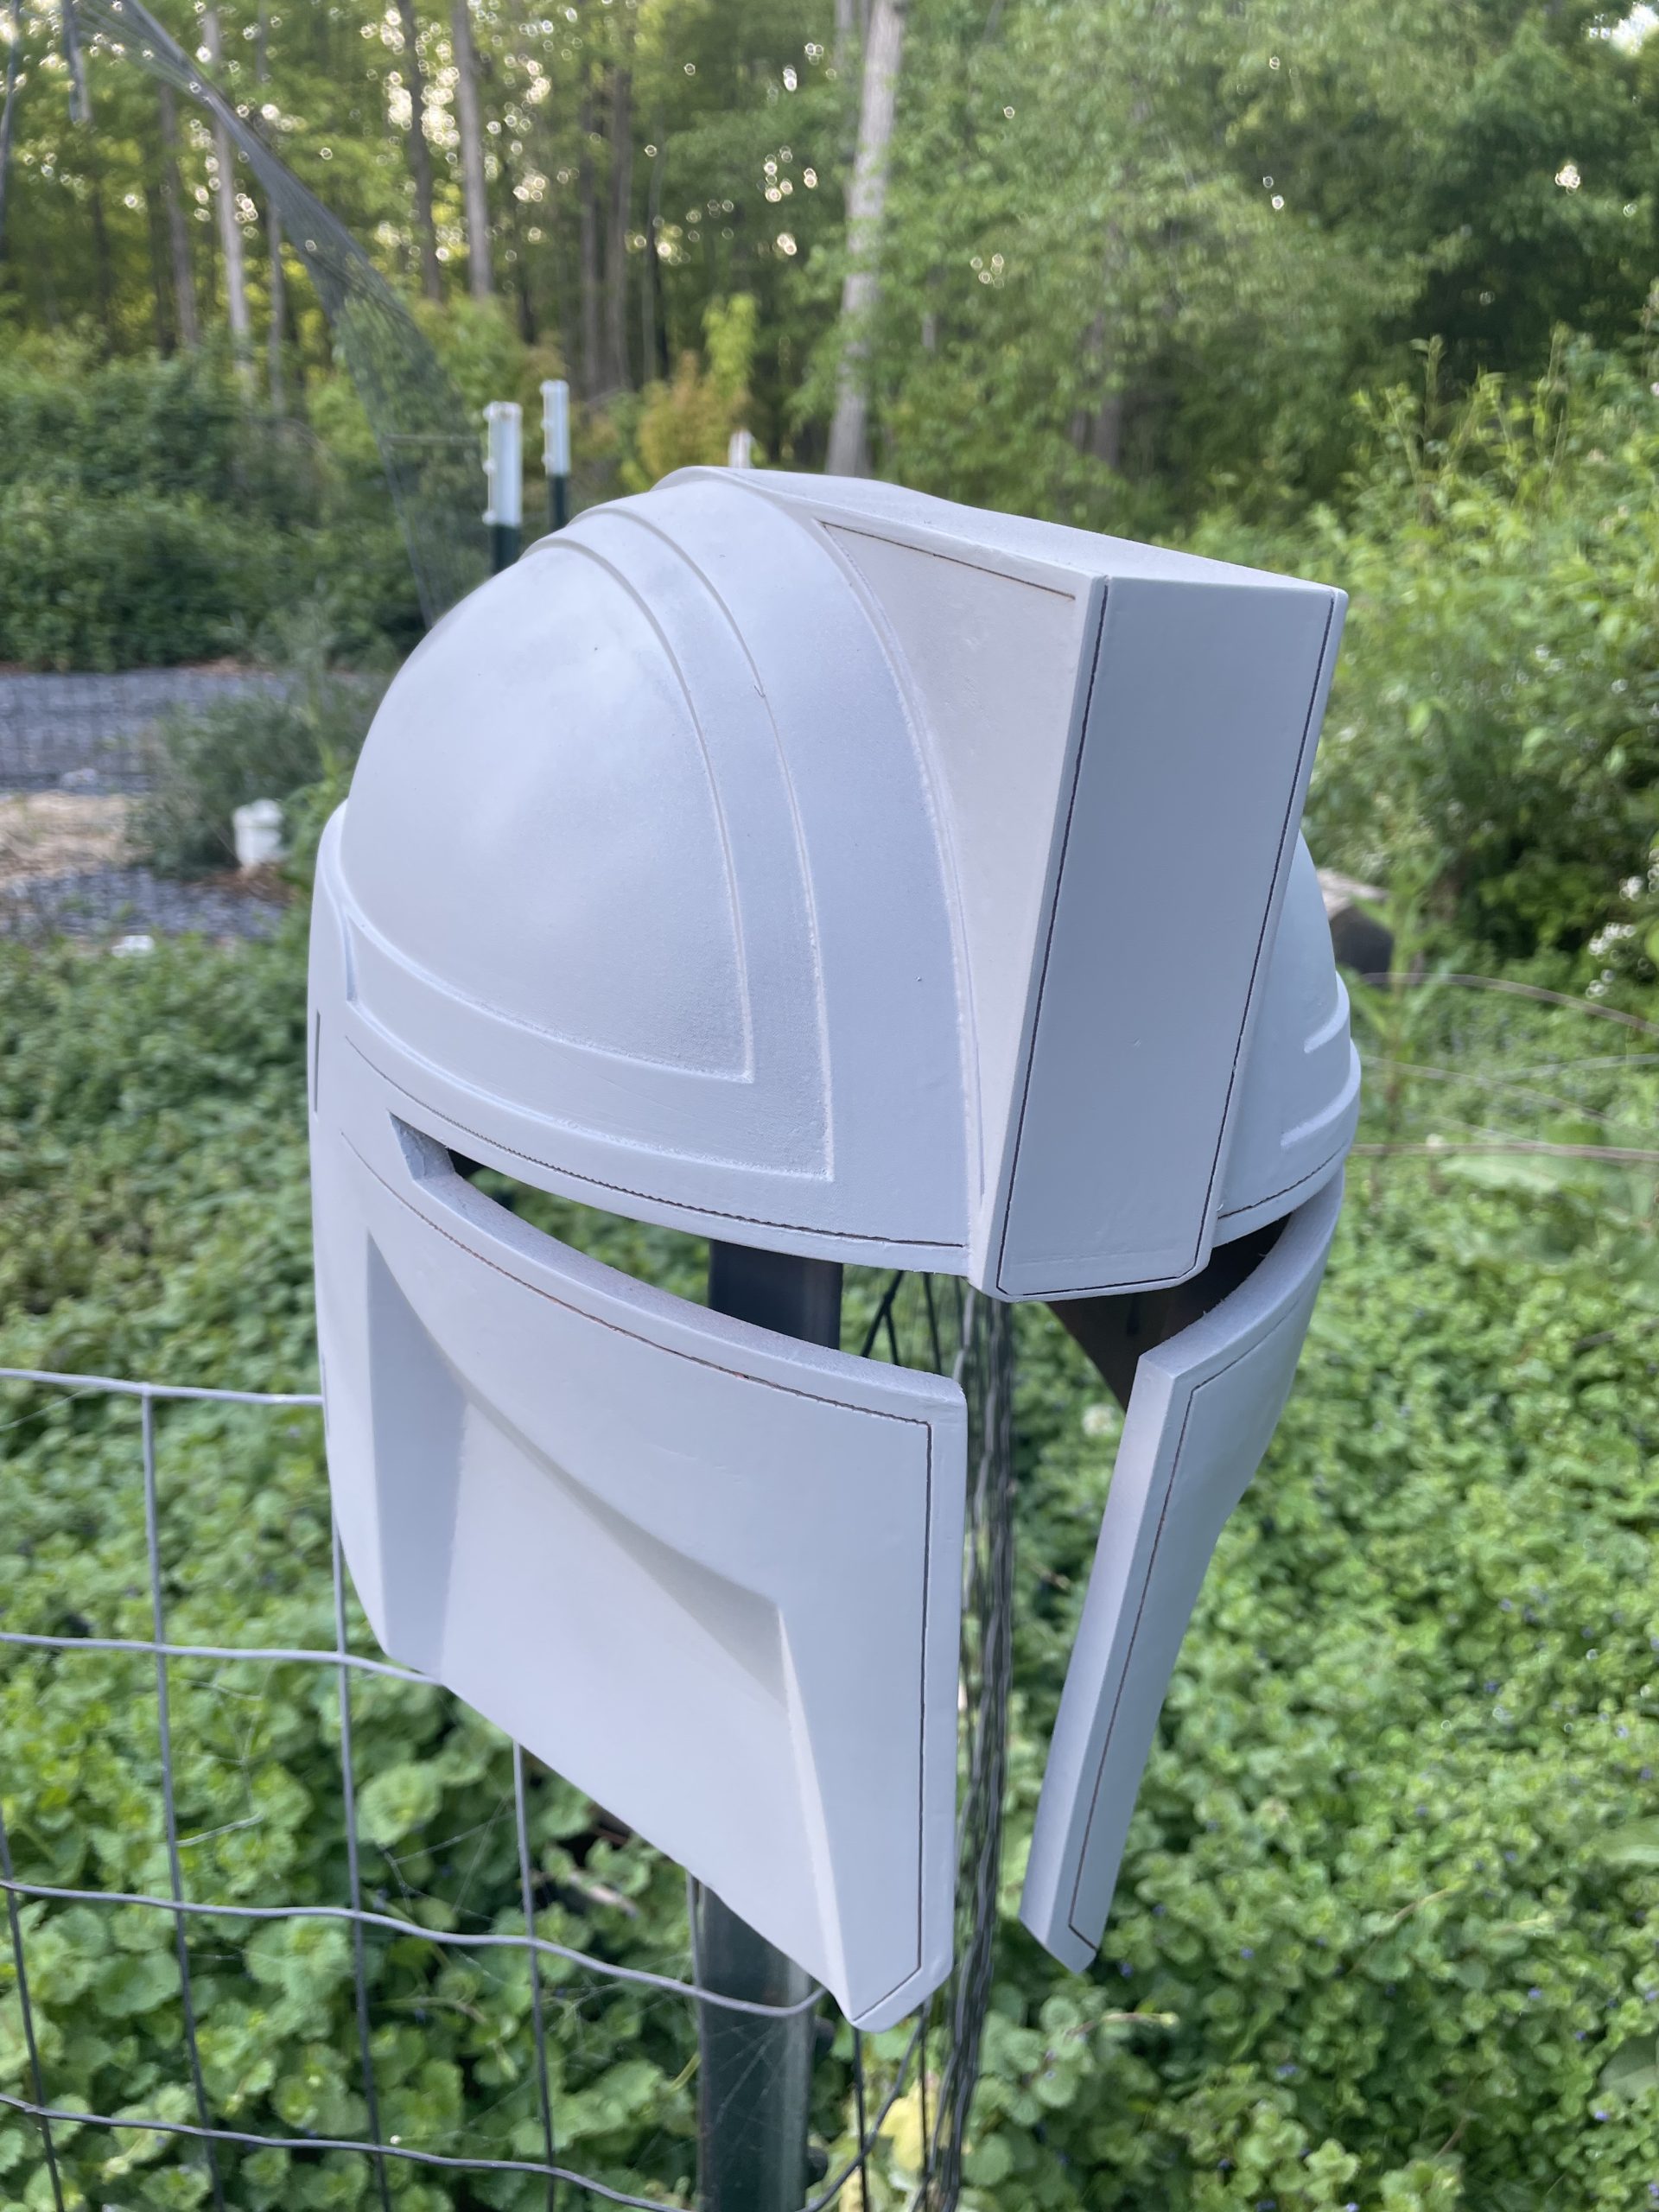
3D Printing is a great way to create physical items for cosplay, home decor, and many other purposes. For most uses, the print lines are not appropriate for a final product.
All of the prints we sell are intended to be high quality, but have fine lines which will show through many layers of paint. Fortunately, a little prep work will result in amazingly smooth finishes. This is the process we use, as learned from Ben Eadie, who has made props for blockbuster Hollywood movies.
1. Rough Sanding
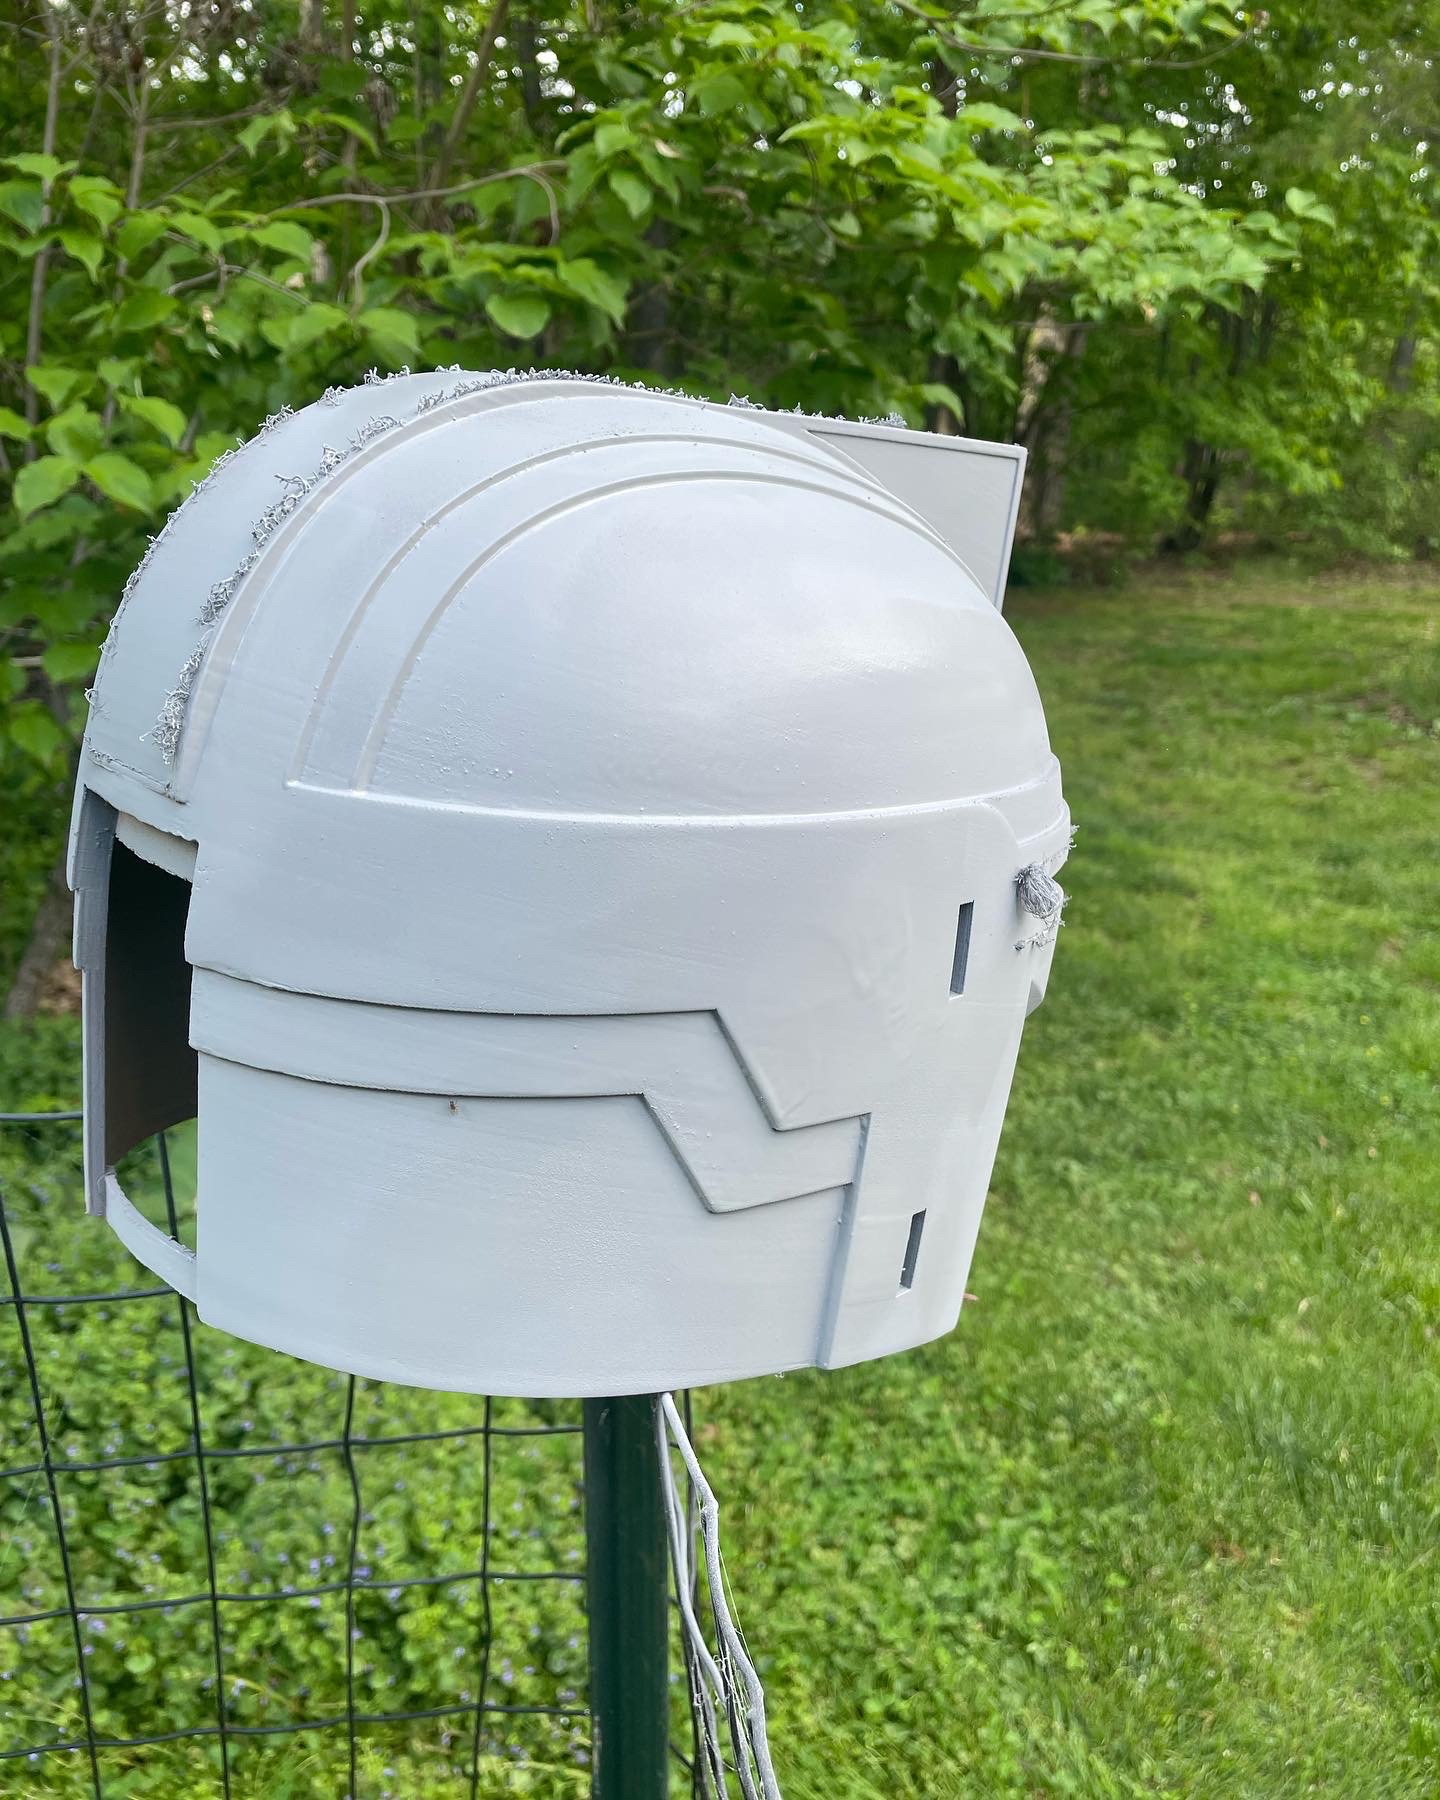
The first step is to rough sand the surface. Don’t shoot for perfection here. The goal is to knock down surface blemishes. This may be support material, ghost lines, zits, and other artifacts from the printing process. We try to clean a lot of this up before shipping, but a few minutes with 80 then 120 grit sand paper here can save a lot of time on the finishing steps.
2. Filler
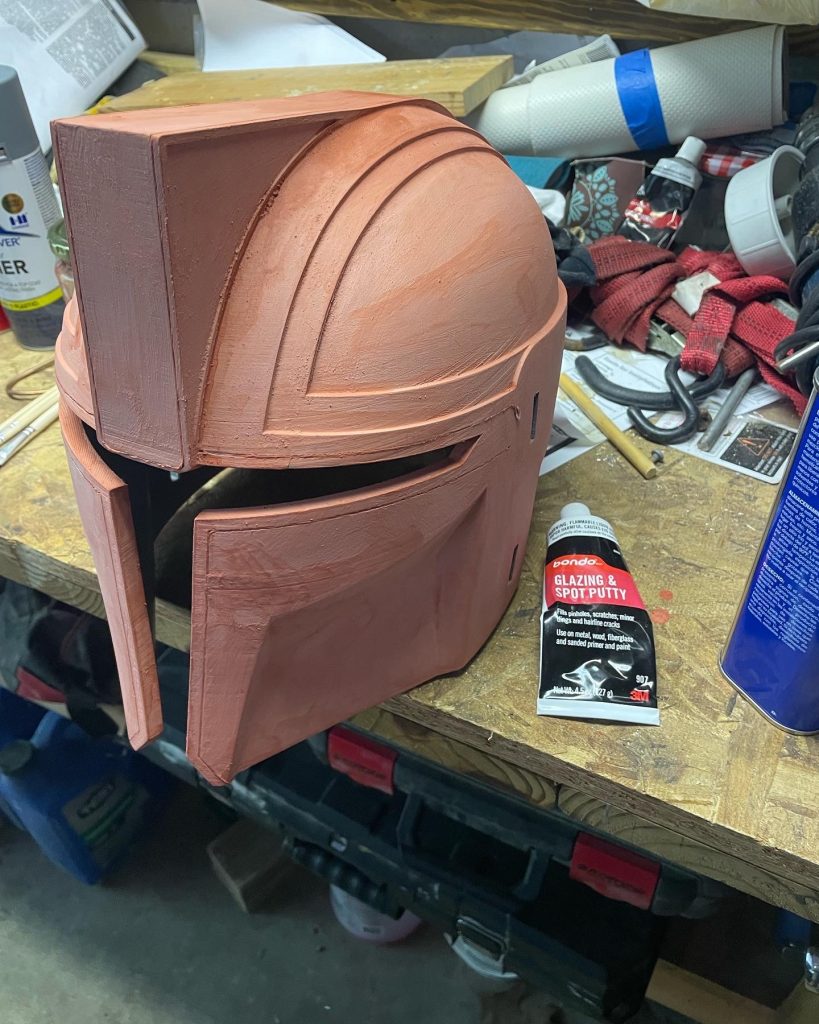
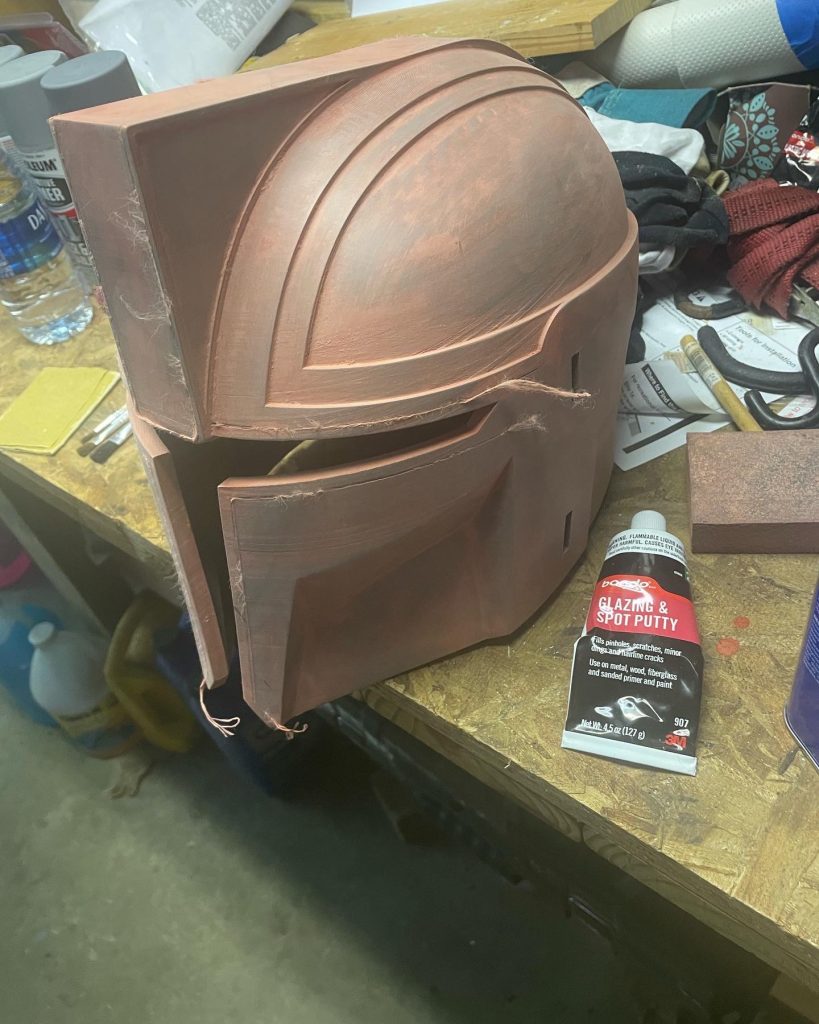
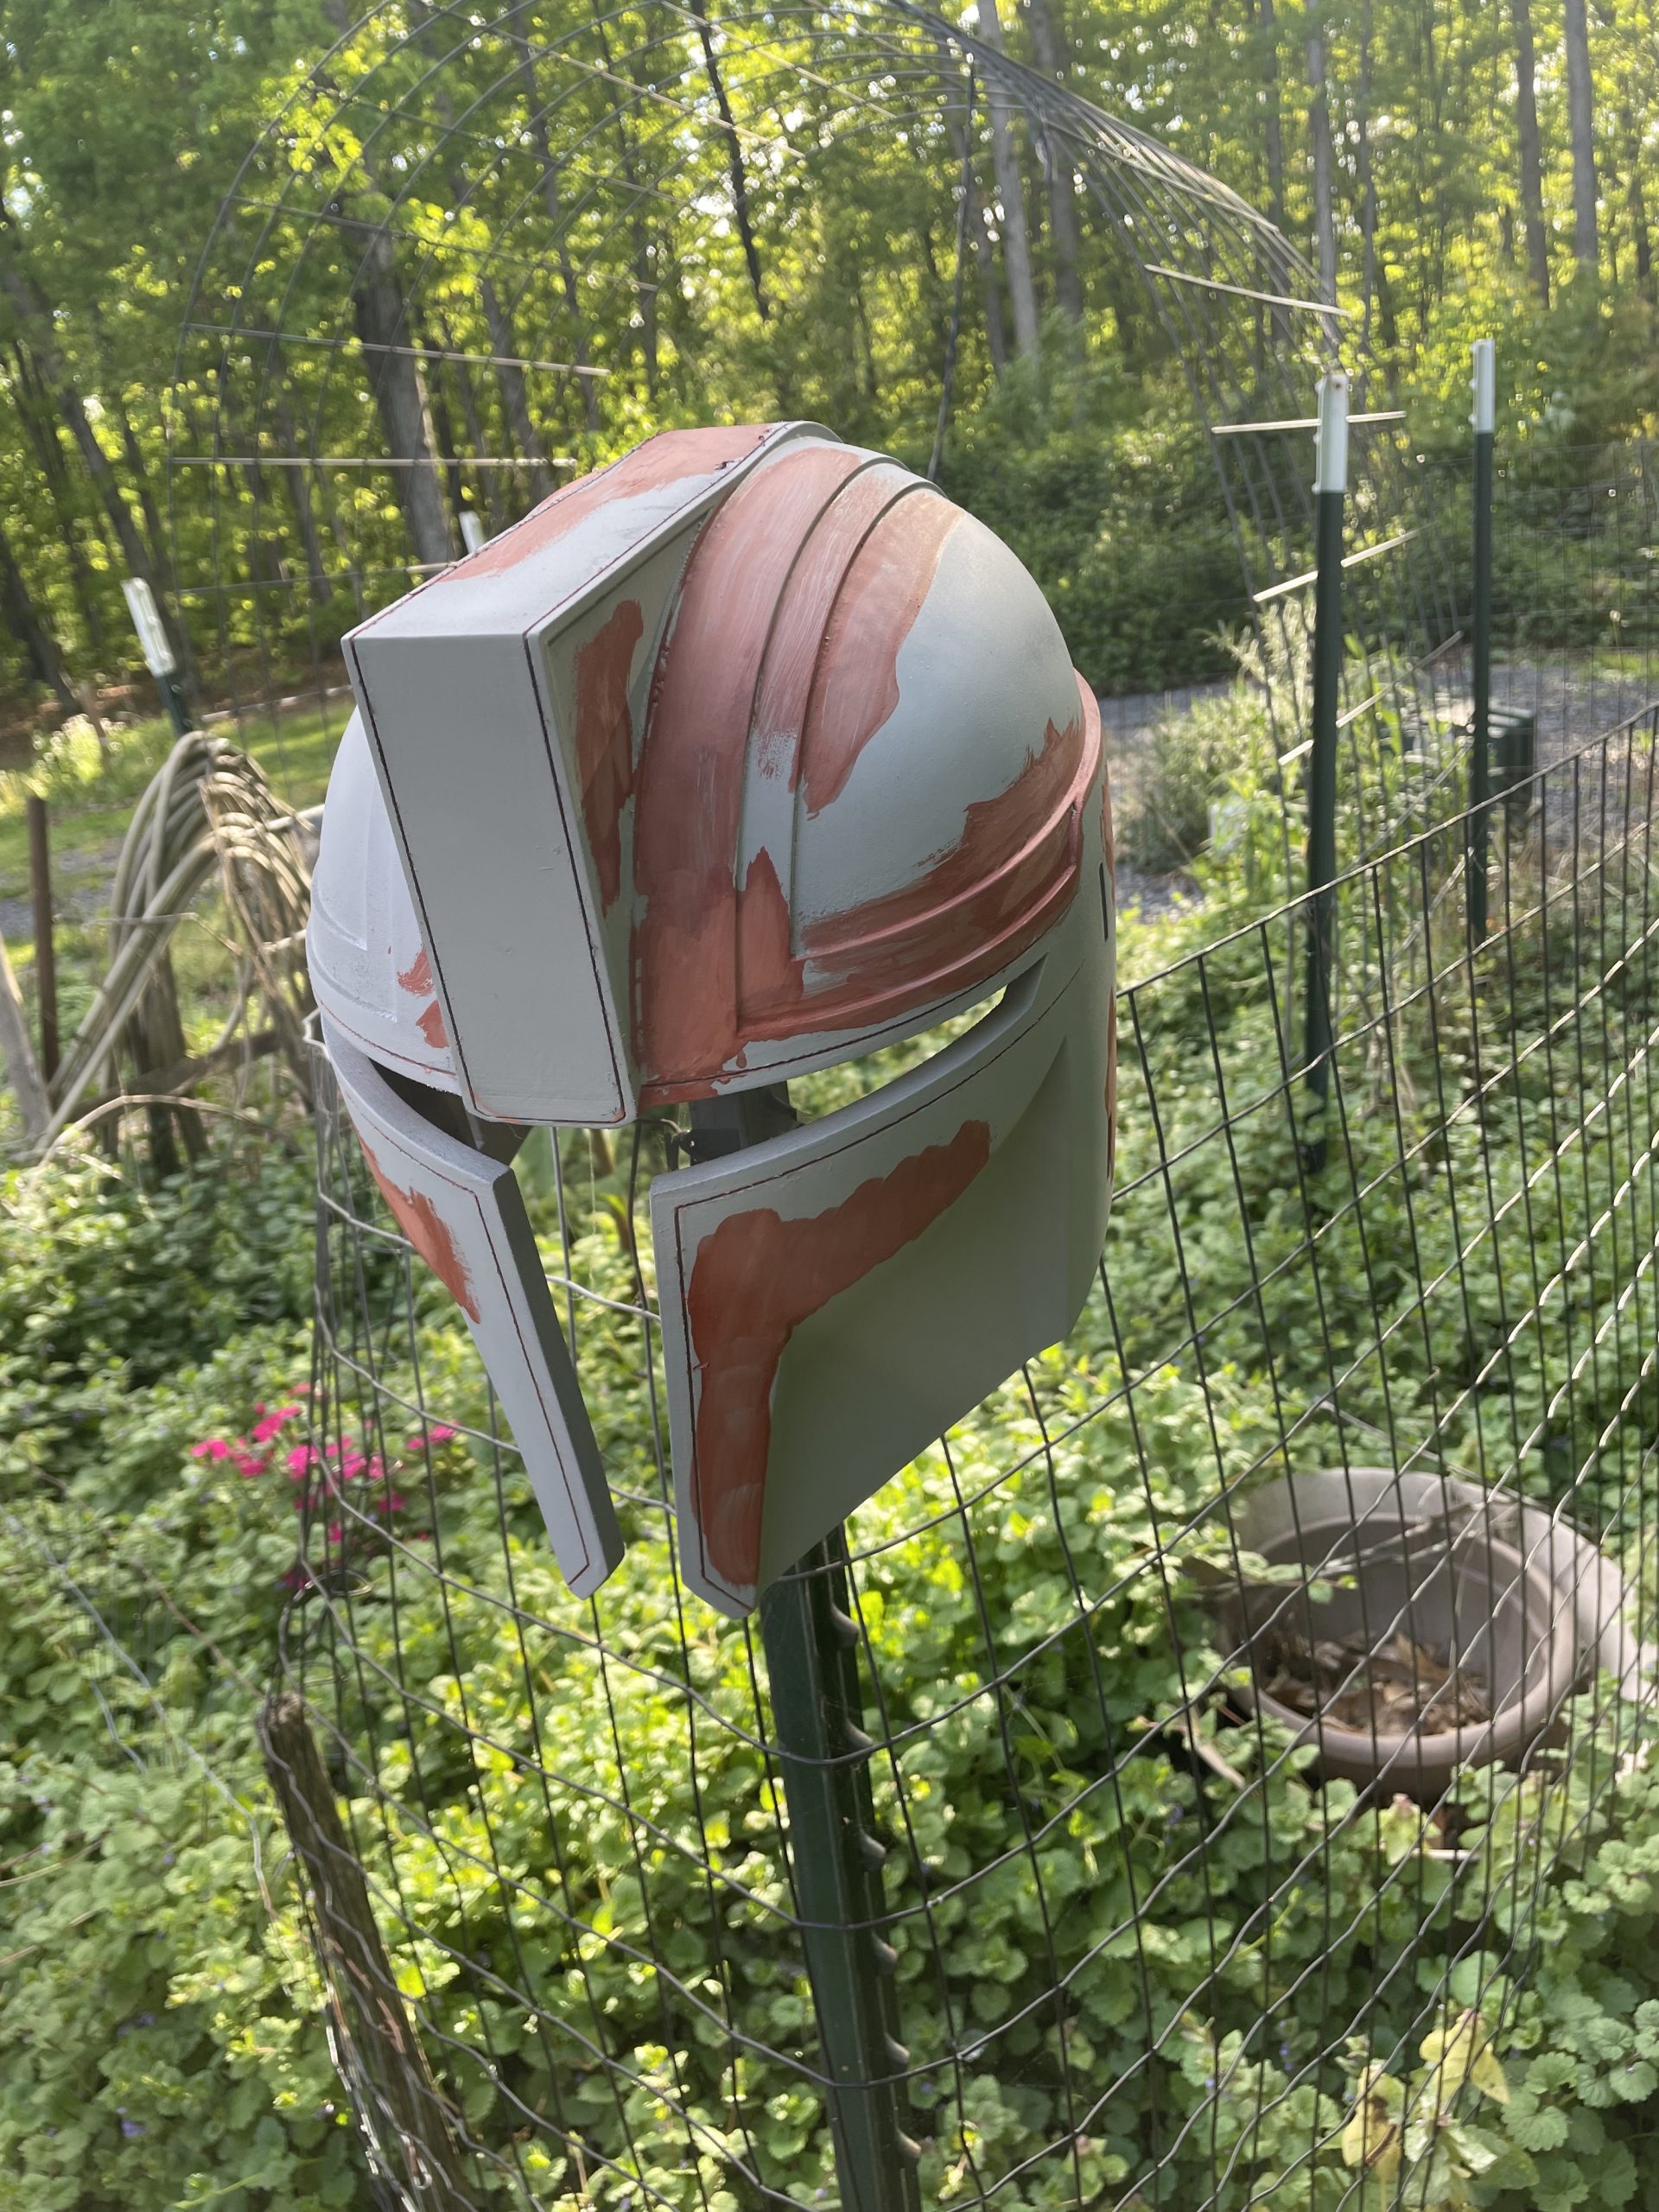
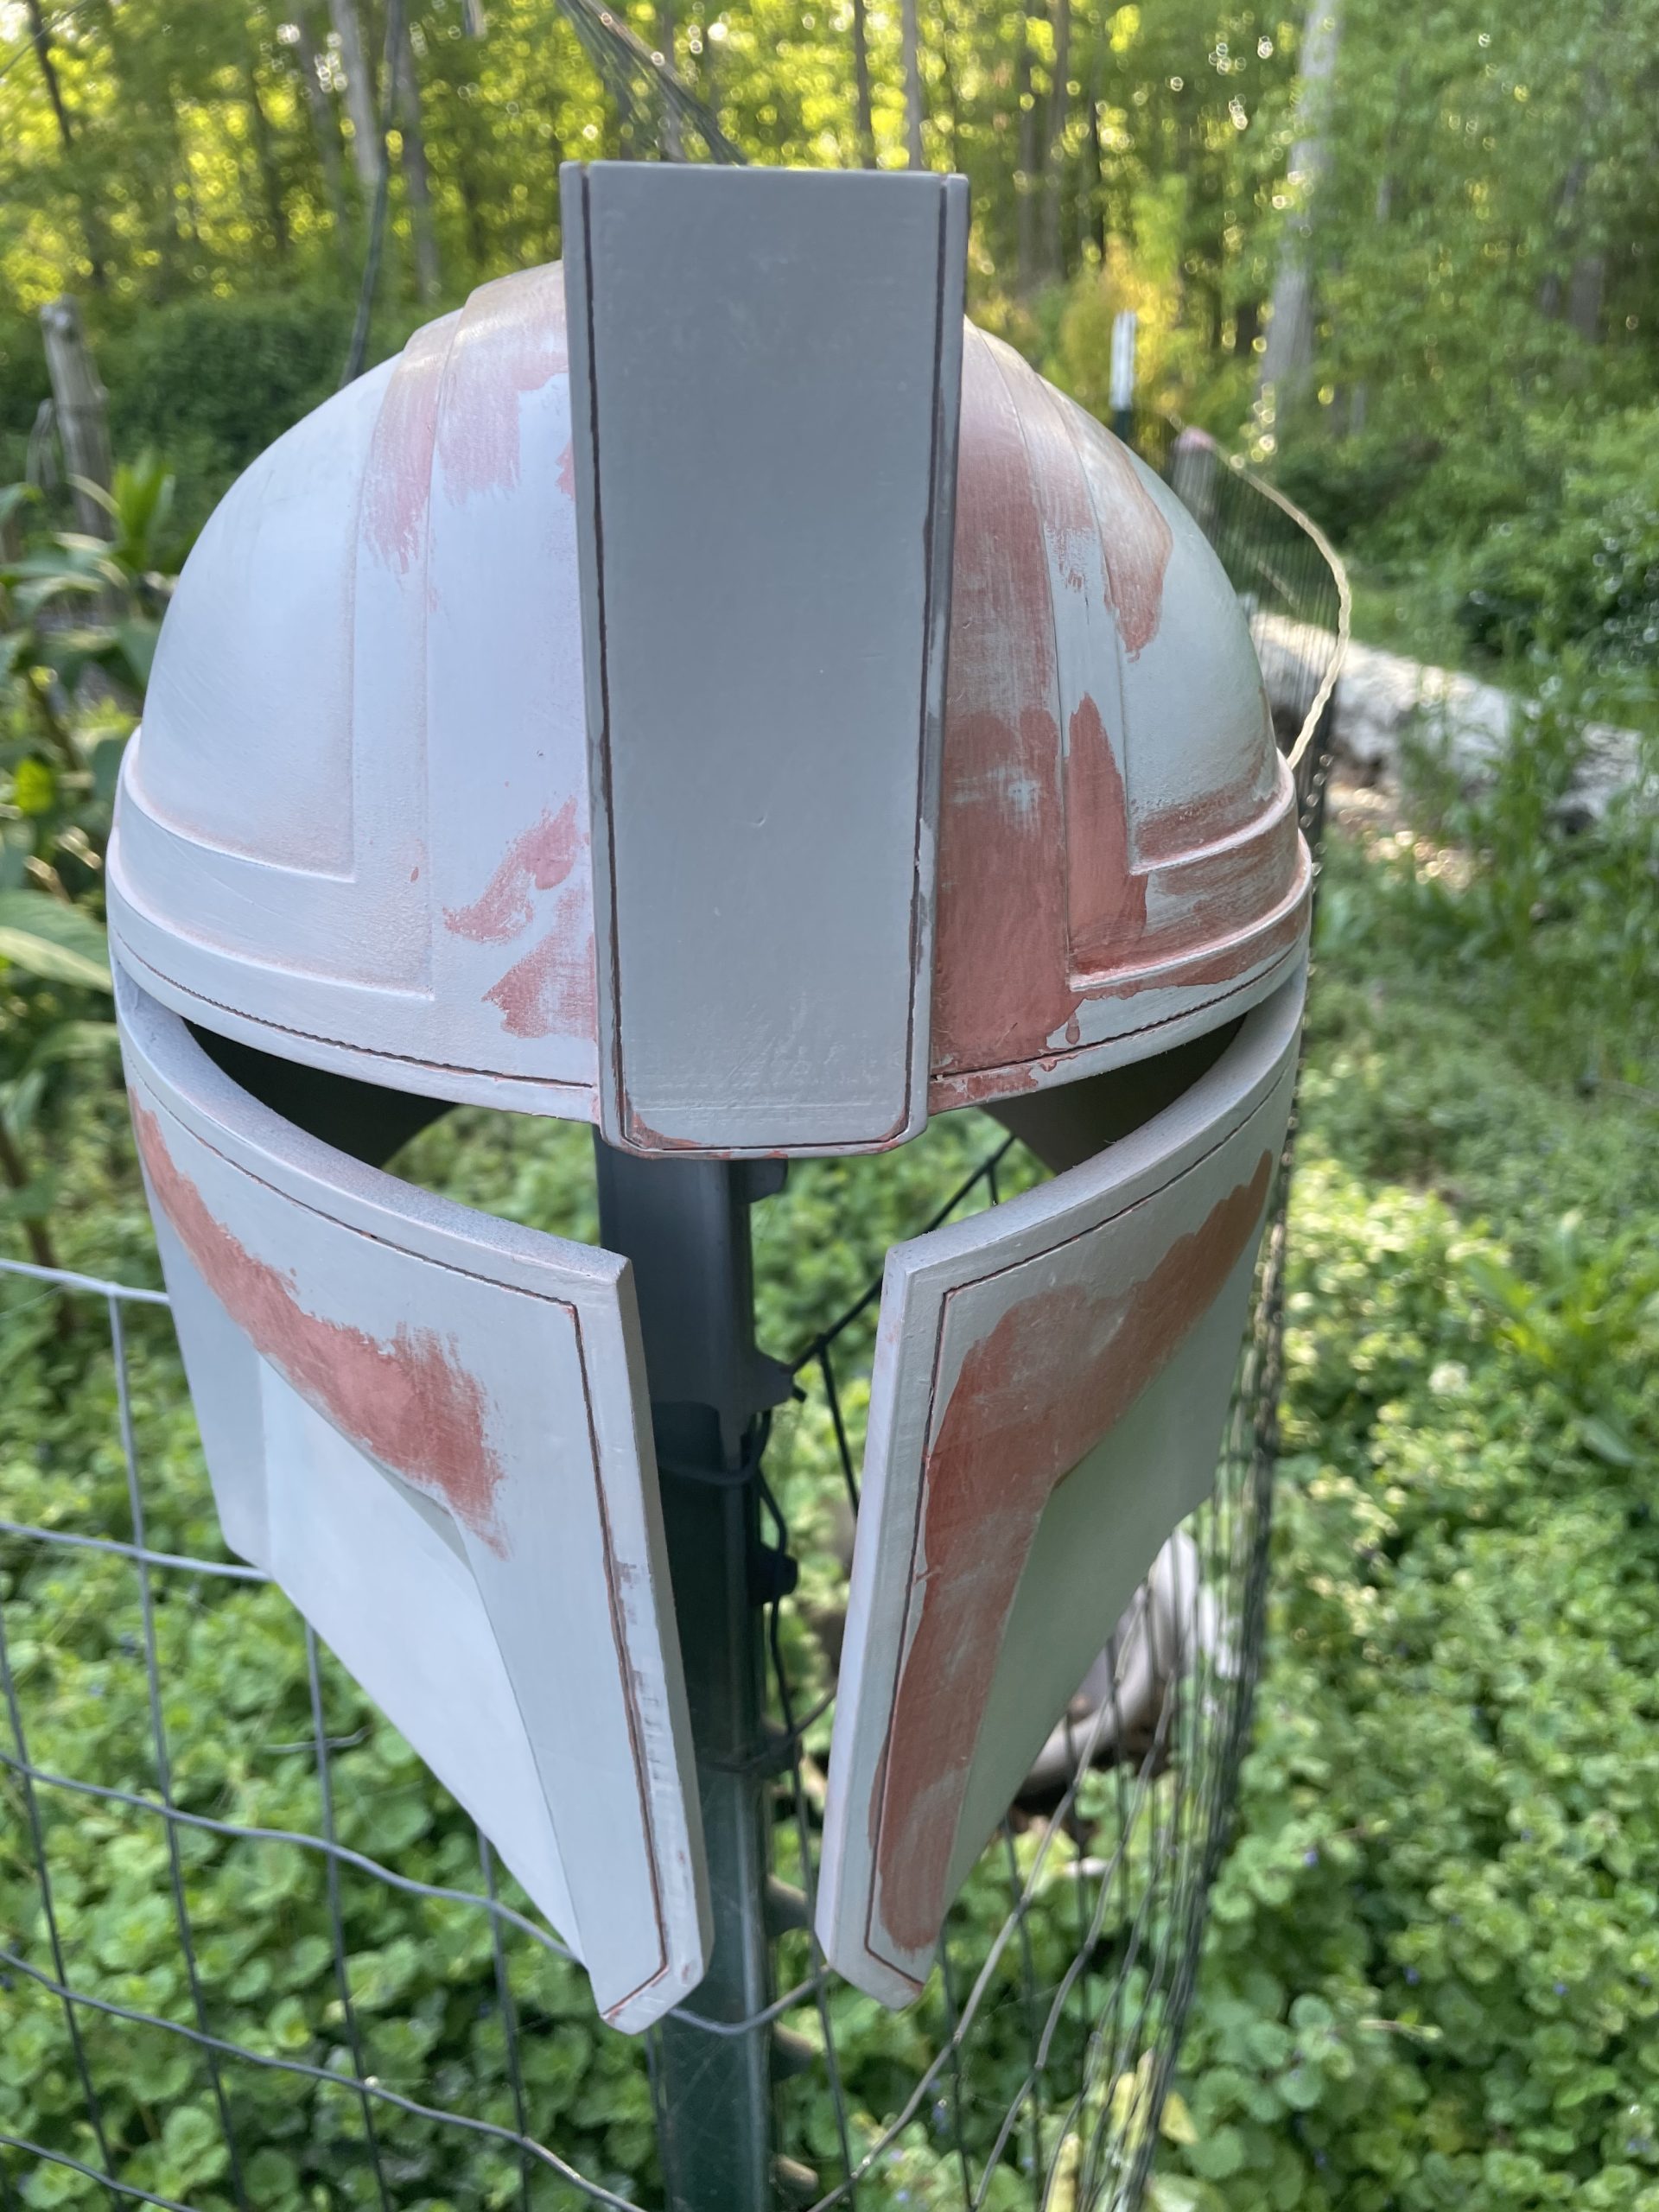
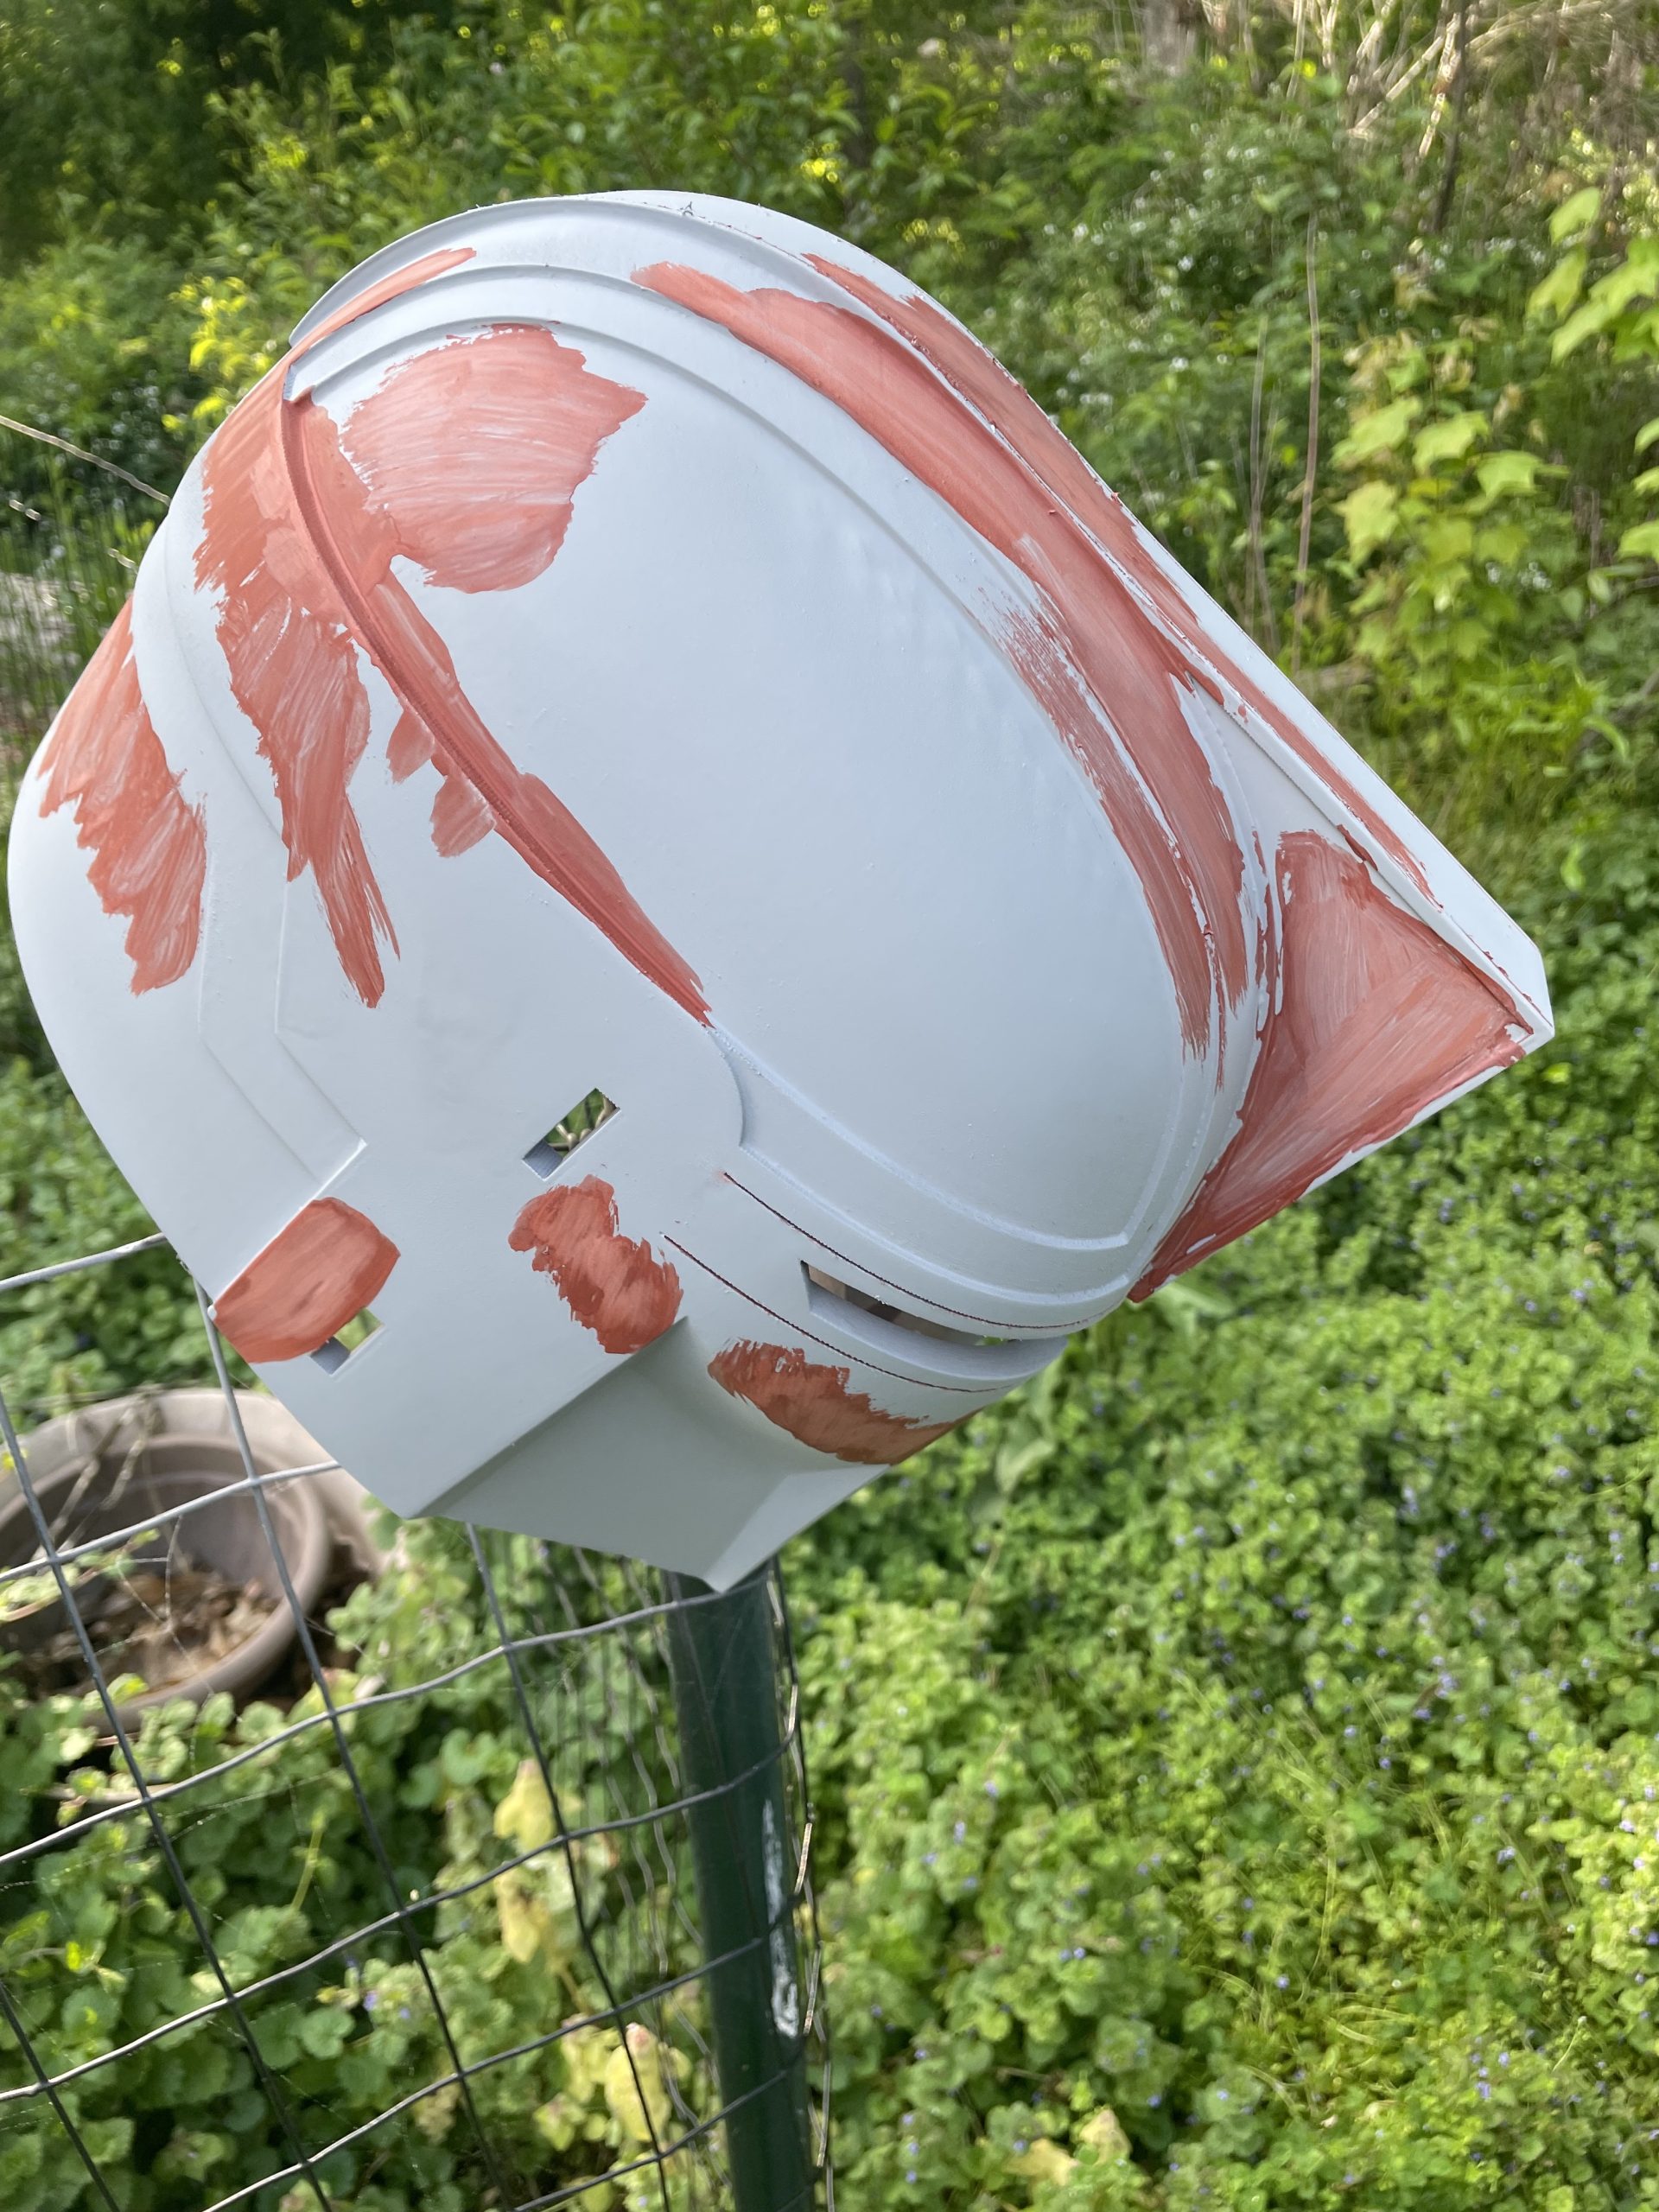
This is the trick we learned from Ben. Get some glazing and spot putty like this Bondo Glazing and Spot putty. You also need acetone and hobby brushes. I like to use left over glass jars from things like pickled jalapeños to mix the filler and clean my brushes.
Now, mix about 1:1 glazing putty and acetone, then brush the solution on. This should be thin enough to brush, but not so thin it runs heavily. With a large piece like a helmet, by the time you are done painting the first coat it will be dry enough to start the second coat.
I find that 3 or 4 coats is fast but thick enough to fill everything nicely. With the right size brush, it takes 20-30 minutes to cover a helmet 3-4 times once you get the swing of it.
Don’t be afraid to mix too much filler. If you are using an old jar then you can screw the lid on and the acetone will stop evaporating, leaving the leftovers for the next project. Give the jar a good shake and it’s ready to go.
Remember to clean your brush when you are done painting. I use a separate jar with just a bit of acetone and scrub the brush down into the jar vigorously. This will keep your brush in good shape for many prints to come.
3. Sanding Part Two
At this point you can either take a break or get straight to the sanding. The filler dries very quickly so by the time you are done cleaning your brush it should be ready to sand. This product sands very easily. I like to use a fine sanding sponge like this 3M Fine Sanding Sponge pack. If you are looking for a specific grit, 180 should be sufficiently fine.
Try to sand across the grain as much as possible or in small circles. Sanding with the grain will lift filler out of the layer lines.
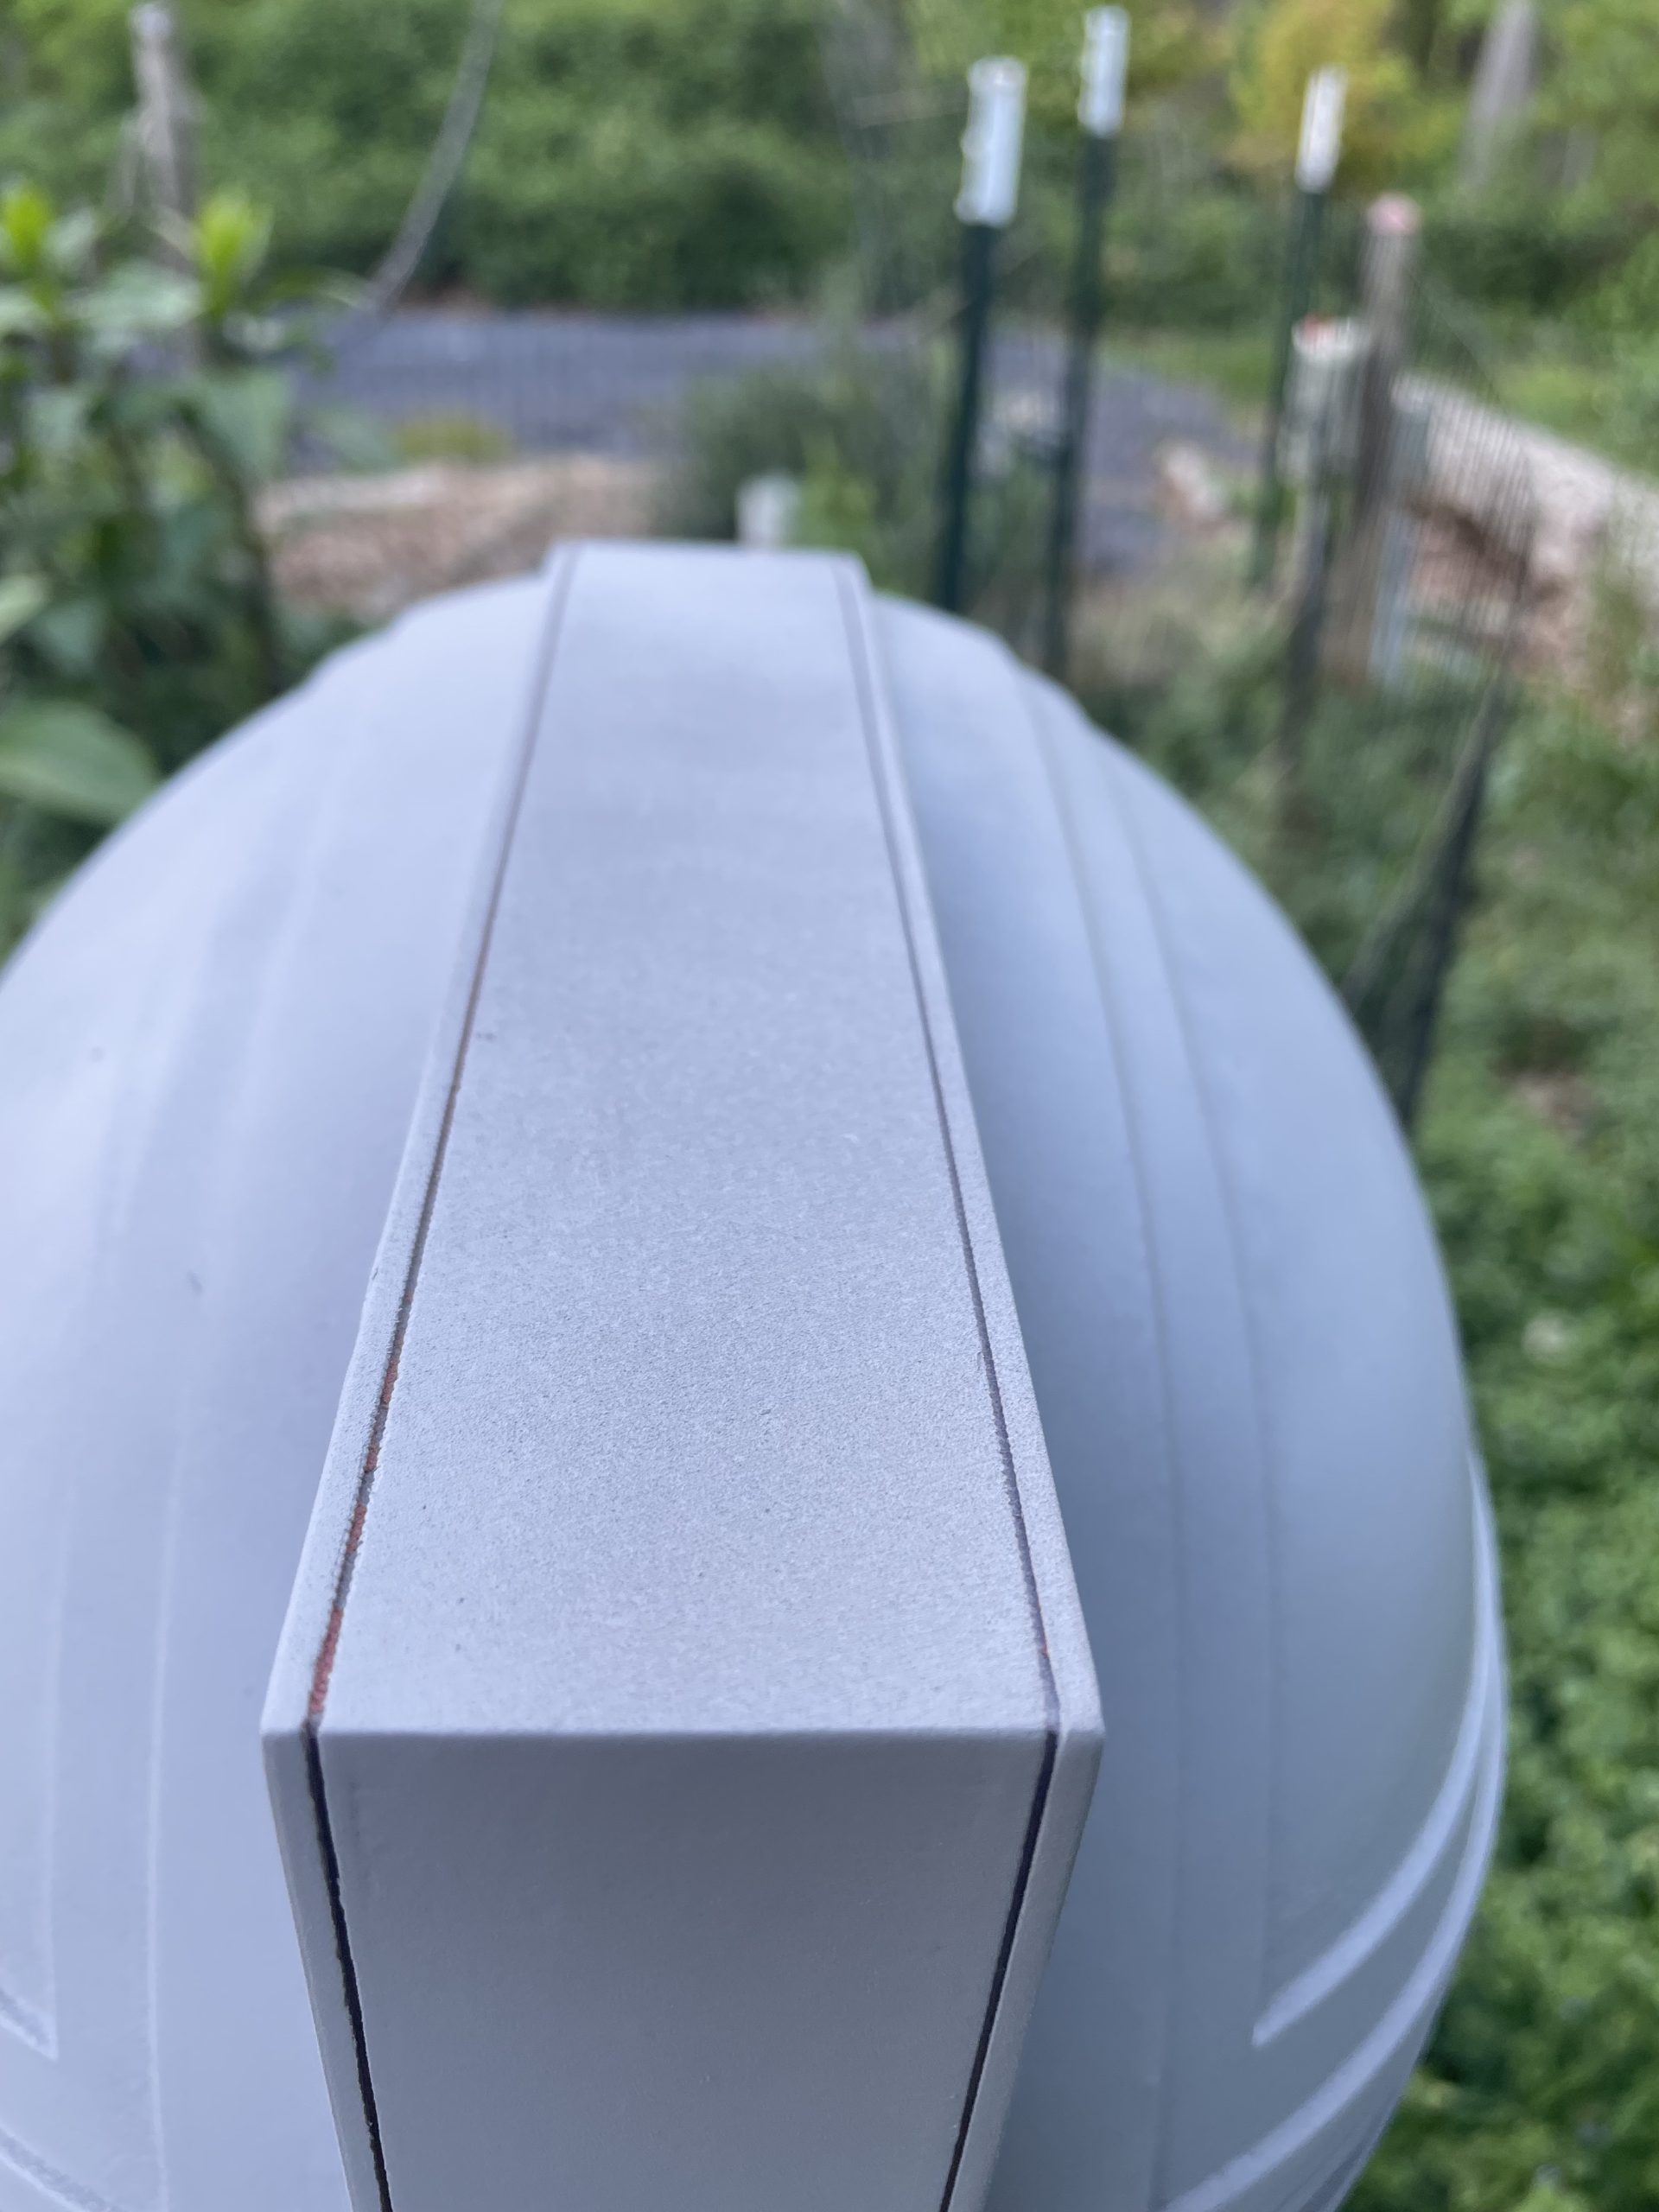
The filler sands so easily it shouldn’t take long to knock down all the excess. This will leave a very smooth surface for the primer step. This part takes a bit of experience, but it isn’t hard earned experience. When the surface is properly sanded it may look like the layer lines are back as the ridge line will be visible, but the filler should be level with the ridge, filling the “valley” completely. Run your finger along the surface to feel that it is smooth.
If there are uneven bits left, it may be necessary to use a more coarse sandpaper and work towards fine. For example, sometimes I might find some clumping of filler that needs to be smoothed down more rapidly. So I take 80 grit sandpaper and quickly knock it down, then use 120 and finally finish with 180. Sight helps some with deciding if you need any more aggressive sanding, but touch is what really helps at this stage. Get a feel for the surface and you will save time reworking the surface after putting on the primer.
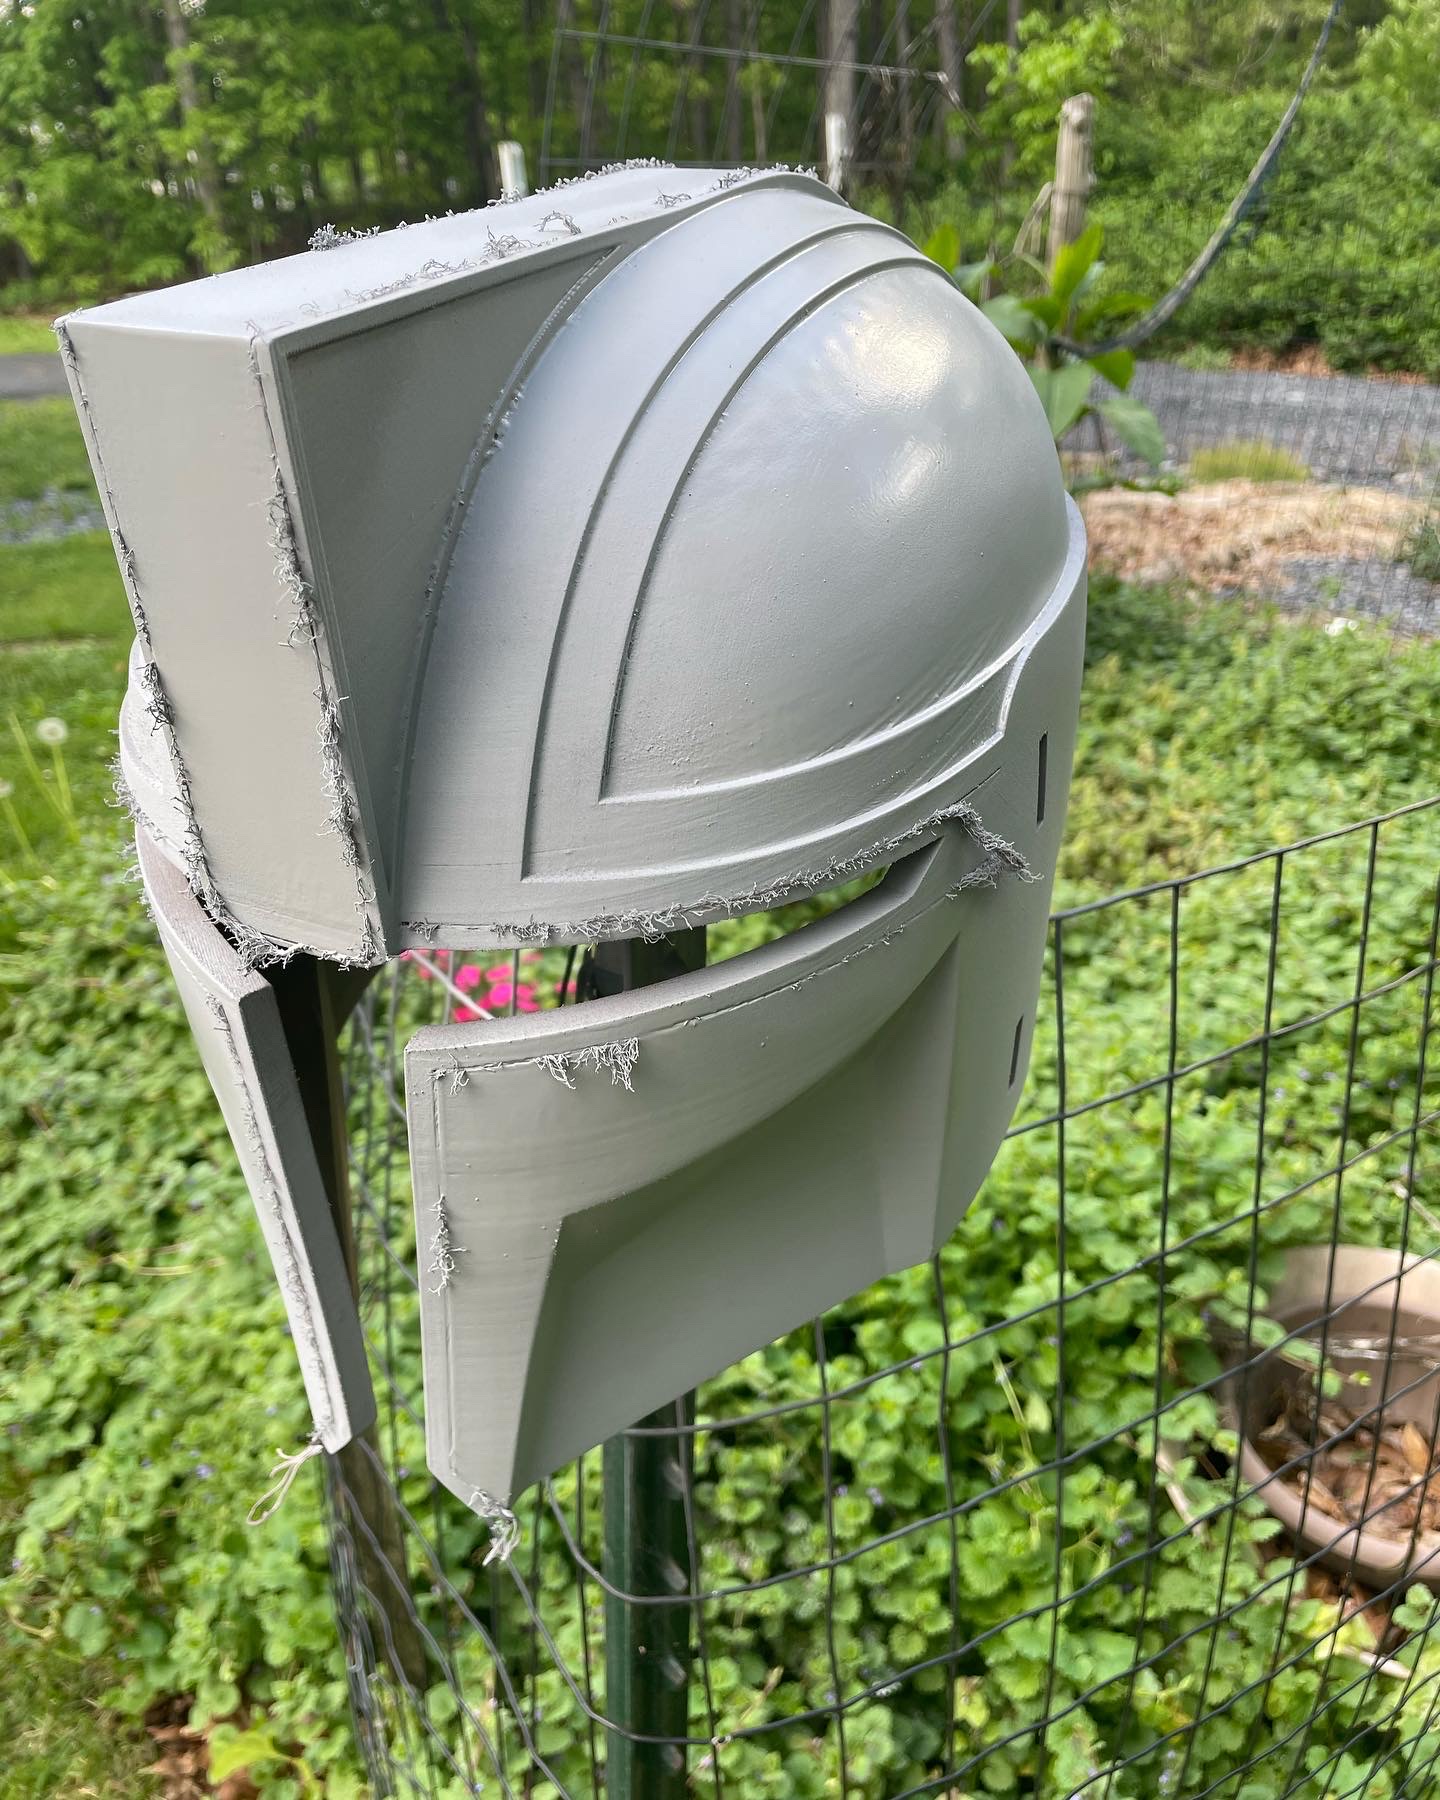
4. Primer
The job is nearly done. The penultimate step is priming (unless you have to go back for any other steps). You will need to get a filling primer. I like fillable and sandable primer. This is a “2 in 1” product but it is actually doing 3 different jobs.
Primer is kind of a glue. It bonds to materials that paint doesn’t normally bond well to. Plastic is one of those surfaces. Filling primer is thicker than normal primer and will fill in remaining layer lines, scratches from the sandpaper, and other fine blemishes. The “sandable” part means that the primer sands easily, leaving a very smooth finish.
If the prep work to this point was done correctly, you will need 2 or 3 thin layers of primer. Make sure you shake the can well and wipe off dust from the part. It really needs to be cleaned well because dust can cause issues with the primer bonding and even leave clumping.
Now place the part where it can be sprayed. For a helmet I put it on a stake out in the yard. Use short, controlled bursts while moving the can. Try to keep the nozzle 8 inches or so from the surface and start the spray just as you move onto the part and stop as you move off. Again, this takes a bit of experience, but just a little practice will make nearly perfect. Since this is sandable it’s a good time to get that practice in so your finish coat is pristine.
Primer dries quickly as long as the coats are thin, so when you finish, go back to the start and repeat. If there are runs don’t try to clean them up, just try to learn from it and avoid the mistake that led to the drip. The most common error is holding the nozzle in one place too long. Always keep it moving. At this stage the drips will be sanded off. The finish coat isn’t as forgiving, so best to make your mistakes now.

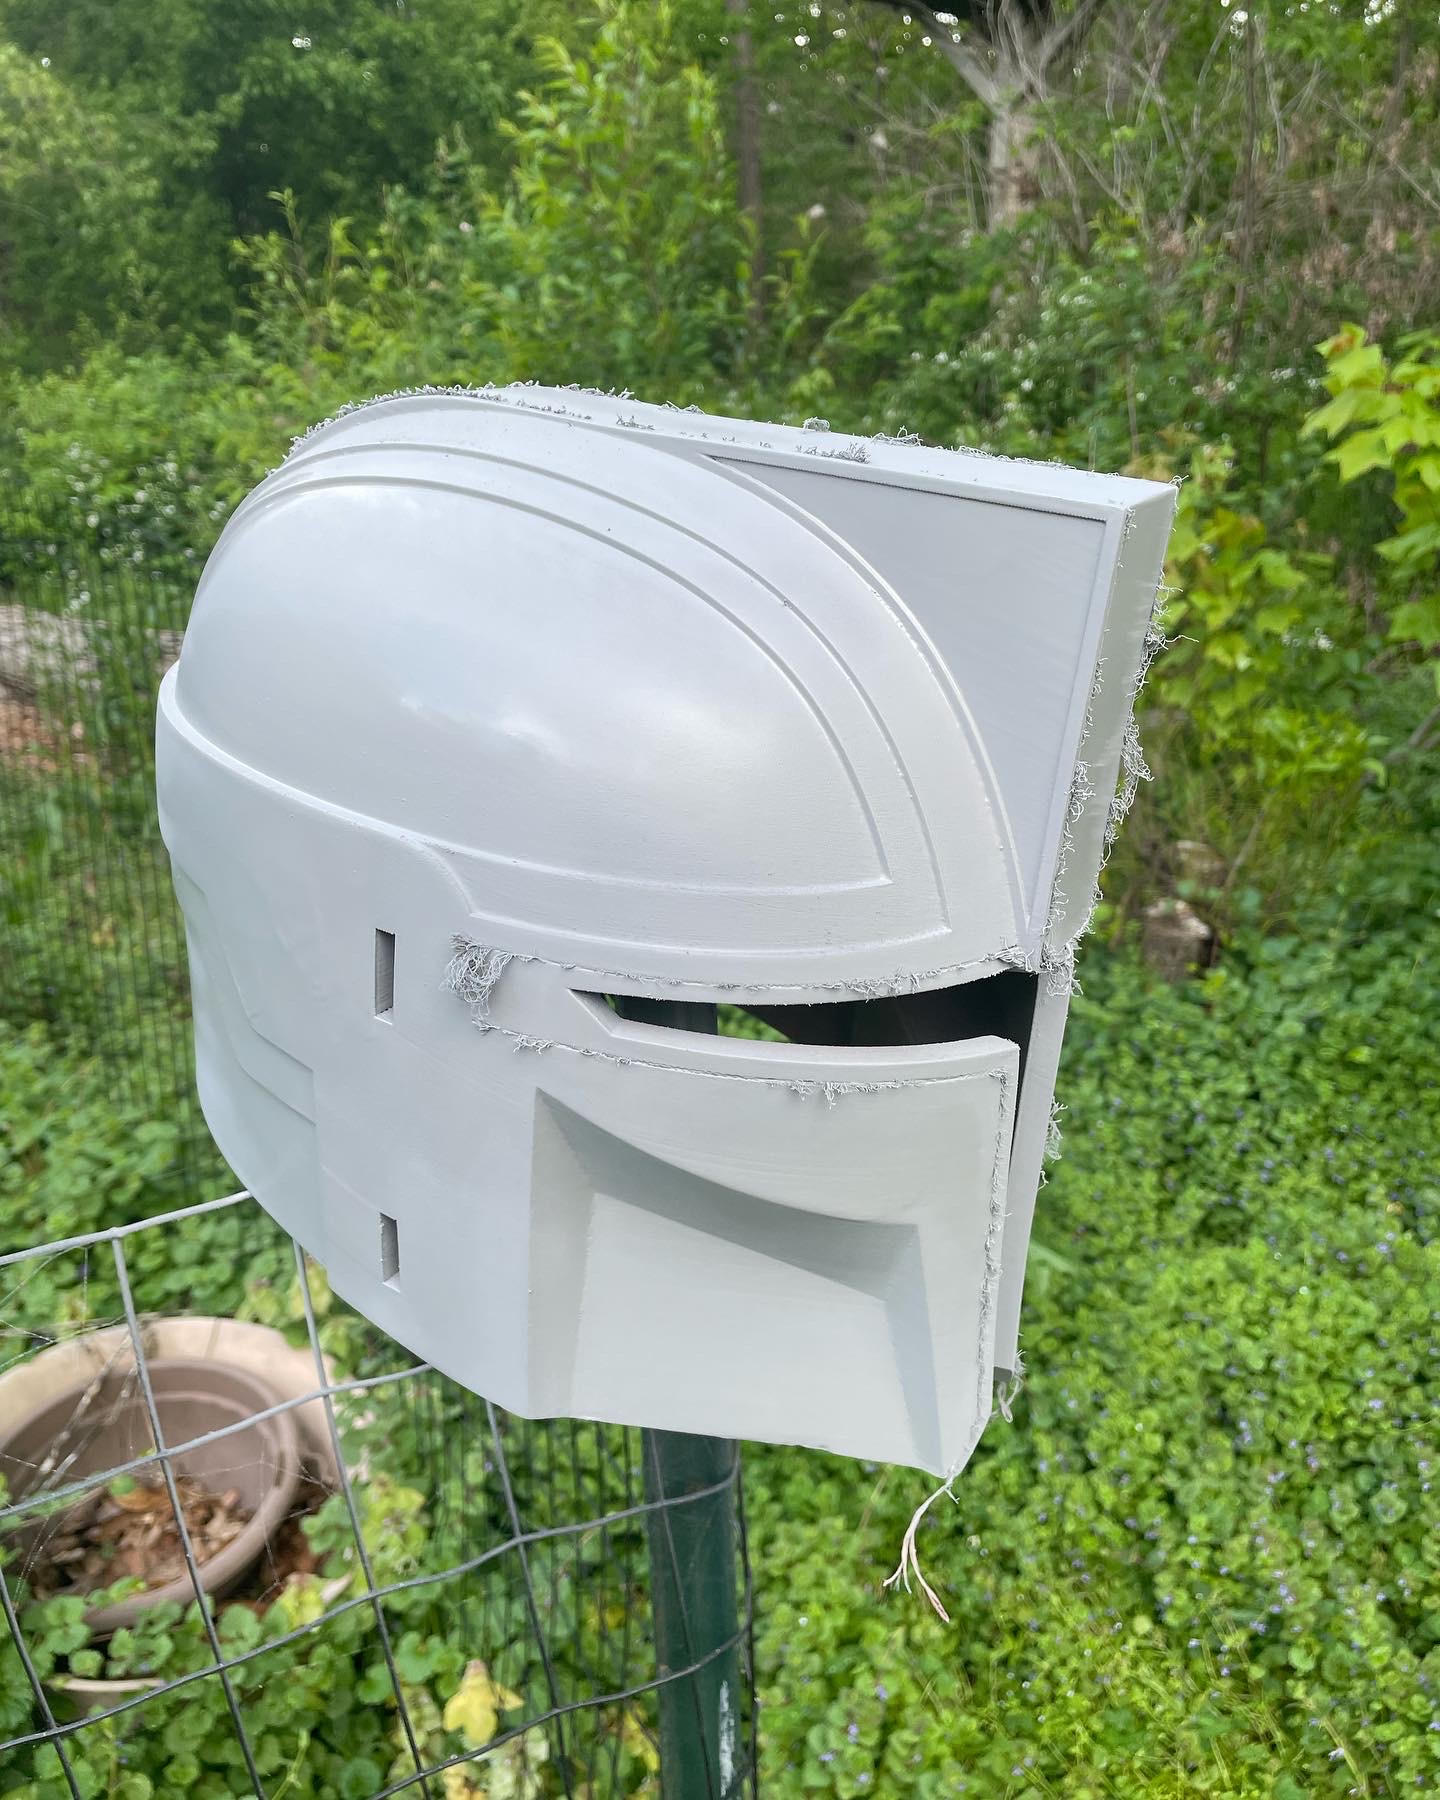
After 2 or 3 coats, the filler should no longer show through, and the surface should look very smooth. If you didn’t get the filler sanded perfectly smooth in the previous step, some edges may be showing through now. Glossier finish coats will magnify these imperfections, so be prepared to fix them now.
5. Sanding Part Three
It’s very possible that you are done! If you did the filling and sanding perfectly in the second and third step, then the primer won’t reveal any imperfections. The thin coats leave a somewhat powdery finish, so you may wish to do some sanding at this stage depending on the final finish you desire. For that I’d recommend an extra fine, 220 grit, sanding sponge. Use small circles and alternate clockwise and counter clockwise for a super smooth finish before applying the finish coats of paint.
However, if you are like me, you probably found some spots that need a little more work. Usually this is some of that filler that didn’t get sanded just right, leaving a bit of a ridge or maybe a small section that didn’t fully fill the layer lines. Use the techniques covered before to finish those bits. Just a touch of filler or some aggressive sanding with 80, 120, and 180 grit to ensure everything is smooth as possible and a few more puffs of primer will have the surface looking great.
If you got runs in the primer, this is also when you want to knock them down. Be sure it is fully dry before sanding. The thicker primer will form a skin that feels dry while the underneath is still drying. Sanding a wet run makes a mess and will leave a ring behind so you have to sand the part to the surface. If it is fully dry first, then a quick sand with 80 grit up to 180 will give you a flat and clean surface.
Depending on what you had to do to fix any of the previous steps, you may need to hit another layer of filler primer then optionally do the extra fine sanding.
6. Finish
That is it, you should have a part that is ready for top coats. From this point, there are many ways to finish the part. Generally speaking you are likely to add at least one more layer of finish paint. You may spray it on, brush it on, use an air brush, or even use some fun dip methods. It’s possible your part will need weathering or other techniques during the finish stage and you are also likely to want to apply a clear, protective layer like this Minwax Clear Polycrylic. This is a great way to protect all the hard work you’ve done. This is water soluble and doesn’t change the color of the part. It is also available in ultra flat, matte, satin, semi-gloss, and gloss finishes.